")


How We Covered Our Popcorn Ceiling with a Modern DIY Slat Ceiling for Under $1200
If you’ve been searching for an affordable way to update an outdated ceiling, this modern DIY slat ceiling might be exactly what you need. We’re Sway and Sarah, a husband-and-wife duo tackling home renovation projects in our 1970s fixer upper one room at a time. We love sharing budget-friendly builds that are equal parts stylish and approachable—and this ceiling transformation checks all the boxes.

Disclosure: This blog contains affiliate links. We will receive a commission for items purchased through these links at no extra cost to you. We appreciate your support! Please read all labels and follow all manufacturer safety recommendations when working with paints, stains, and other tools + equipment.

From Popcorn to Polished: Modern DIY Slat Ceiling Glow Up
Let’s start with the obvious.
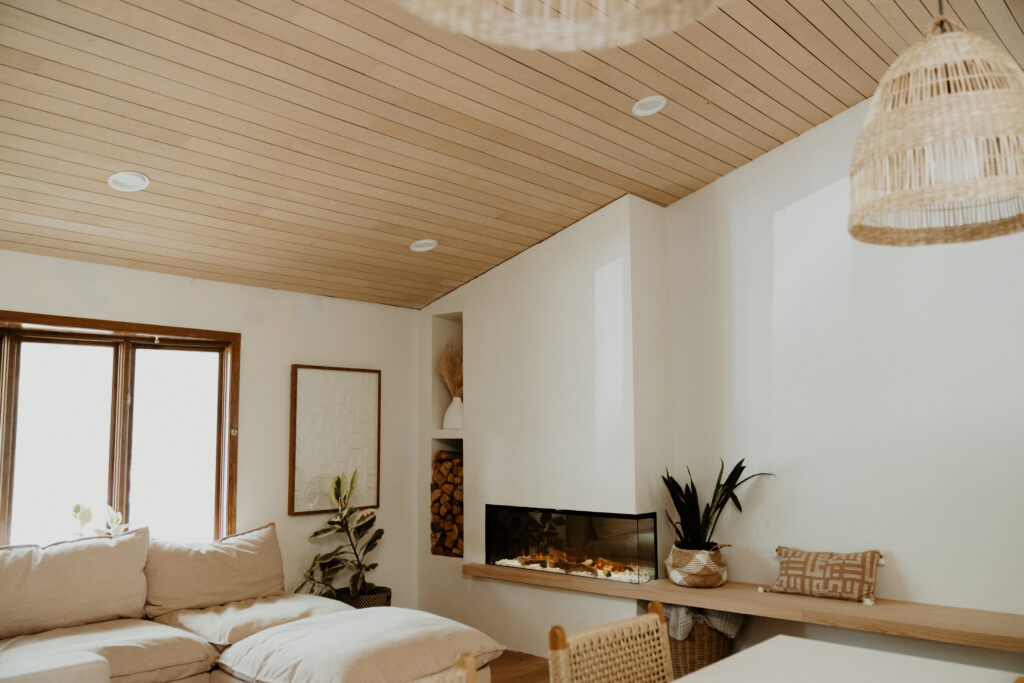
Our living room used to have one of those classic 1970s popcorn ceilings. And not in a charming, retro kind of way. It was dingy, dated, and totally clashed with the cozy-modern vibe we were chasing for this space.
But we weren’t about to drop $6K+ on tongue-and-groove hardwood. We needed a budget-friendly, DIY-friendly ceiling cover-up that still looked custom and high-end.
Enter: the slat ceiling.
Our vision? Warmth, texture, and that Scandinavian-meets-Mediterranean feel: on a budget. For under $1,200, we gave our ceiling the clean, modern makeover of our dreams using ¼” birch plywood, stain, and a little sweat equity.
Why a Slat Ceiling? Our Design Goals
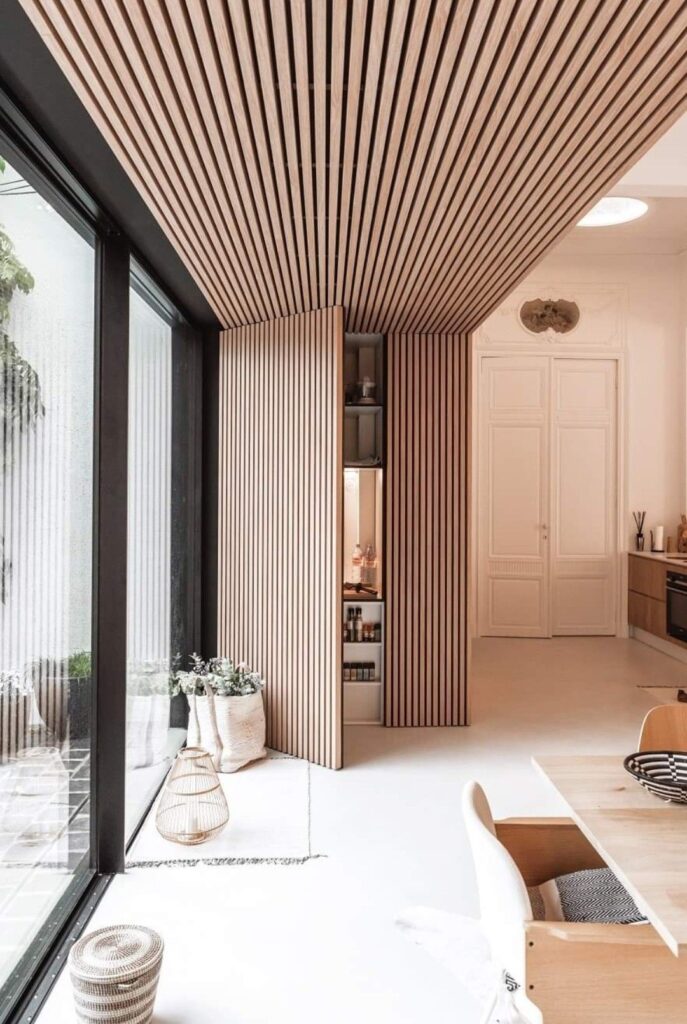
We were aiming for a mix of Scandinavian and Mediterranean design. Something warm and minimal with a little texture and soul. We didn’t want rustic wood tones or anything too knotty, so pine was out. But we also couldn’t justify the cost of real hardwood planks.
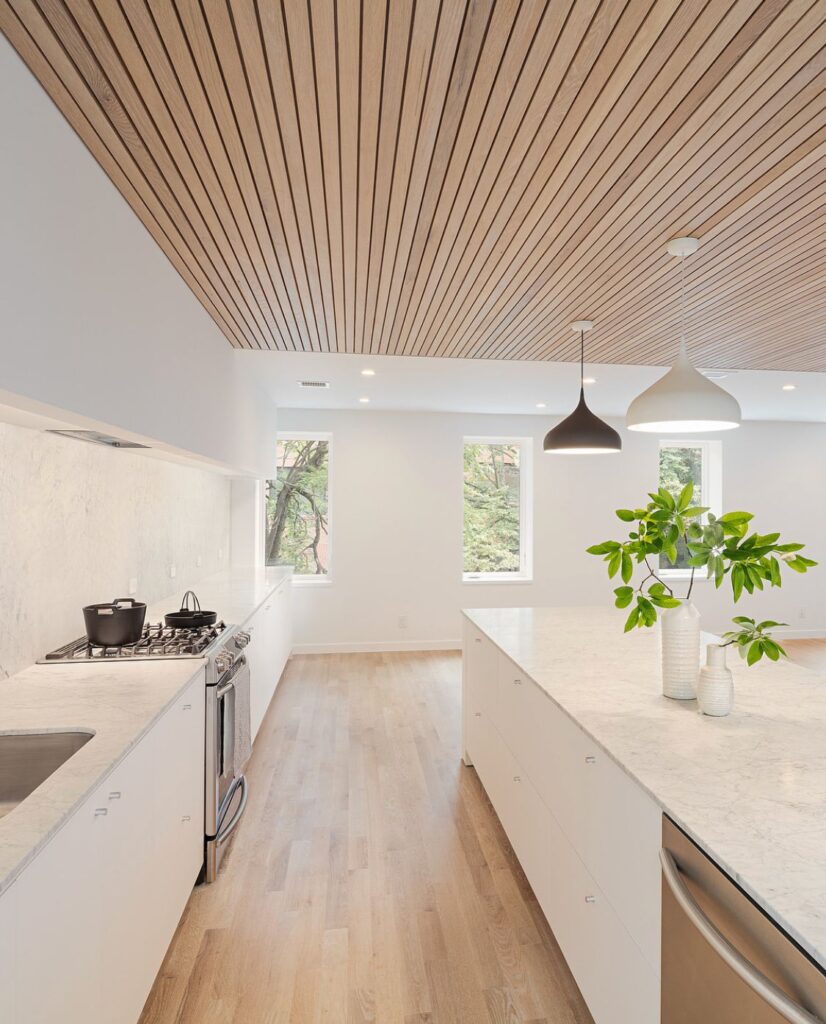
Slat ceilings caught our eye because they’re stylish, customizable, and surprisingly achievable. The vertical lines draw the eye upward and add natural warmth to the space, even when using plywood.
Total cost: under $1,200.
We were after that minimal-yet-cozy ceiling style you see in designer homes. Ultimately, we were searching for something that made our vaulted ceilings pop without competing with the rest of the room.
And this plywood slat ceiling totally delivered.

Materials and Tools We Used
Before we dive into the tutorial, let’s talk supplies.
From prep to install, this project did require a few key materials and tools to pull off smoothly.
Some were simple things we already had on hand, and others we had to rent or buy. If you’re planning a DIY slat ceiling of your own, this list will give you a solid idea of what you’ll need to get the job done without surprises.
Whether you’re working with a standard ceiling or something vaulted like ours, having the right tools on deck can make a huge difference in how smoothly the process goes.
Materials
- 4×8 ¼” Birch Plywood Sheets (25 sheets)
- Behr Water-Based Interior Stain in “Milk Tea” (1 Qt)
Don’t forget: You need the clear stain base and the color gets mixed in store! - Pre-Stain Wood Conditioner
- PL375 Loctite Construction Adhesive
- Brad Nails
Tools
- Compressor
- Brad Nailer
- Stud Finder
- Laser Level
- Table Saw (we rented from Home Depot)
- Safety Gear (goggles + dust mask)
- Scaffolding or Ladder
We used scaffolding since our ceiling is vaulted, but a ladder would work for shorter ceilings
Step-by-Step: How We Installed Our Slat Ceiling
ONE | Measure + Plan
We started by measuring the square footage of our vaulted ceiling and added 10–15% extra to account for cuts or oops moments.
We ended up with 25 sheets of 4×8 plywood and rented a truck to haul them home.
TWO | Cut + Prep the Wood
Once the wood was home, we ripped each sheet into 4-inch-wide strips. This part took a few hours, but consistency was key. We checked measurements every few cuts to make sure the planks stayed uniform.
Then we applied pre-stain wood conditioner to each plank to help the stain absorb evenly. After that, we stained the wood with Behr’s interior wood stain in the color Milk Tea using foam rollers for easy application. We left them out to dry completely.
If you want to make this ceiling last longer and clean more easily, sealing the planks with a water-based poly in matte or satin is a great option. We didn’t do this, but we would recommend it.
THREE | Paint the Ceiling
Before installing the slats, we painted the popcorn ceiling black.
This creates contrast and adds depth behind the slats. Any matte black paint will do since it won’t be directly visible.
OPTIONAL: For added soundproofing, you could add acoustic fabric or padding here too.
FOUR | Mark the Studs
We used our laser level to mark the center of the vaulted ceiling and to locate all the studs across the space. This step is key for both layout and functionality. It helps you keep your rows visually balanced and ensures your brad nails have something solid to grip into, especially important on a ceiling where you don’t want anything shifting or sagging over time.
Taking a few extra minutes here really sets the stage for a smoother install.
FIVE | Install the Slats
We started at the peak of our vaulted ceiling with a narrower plank we cut to fit that top edge.
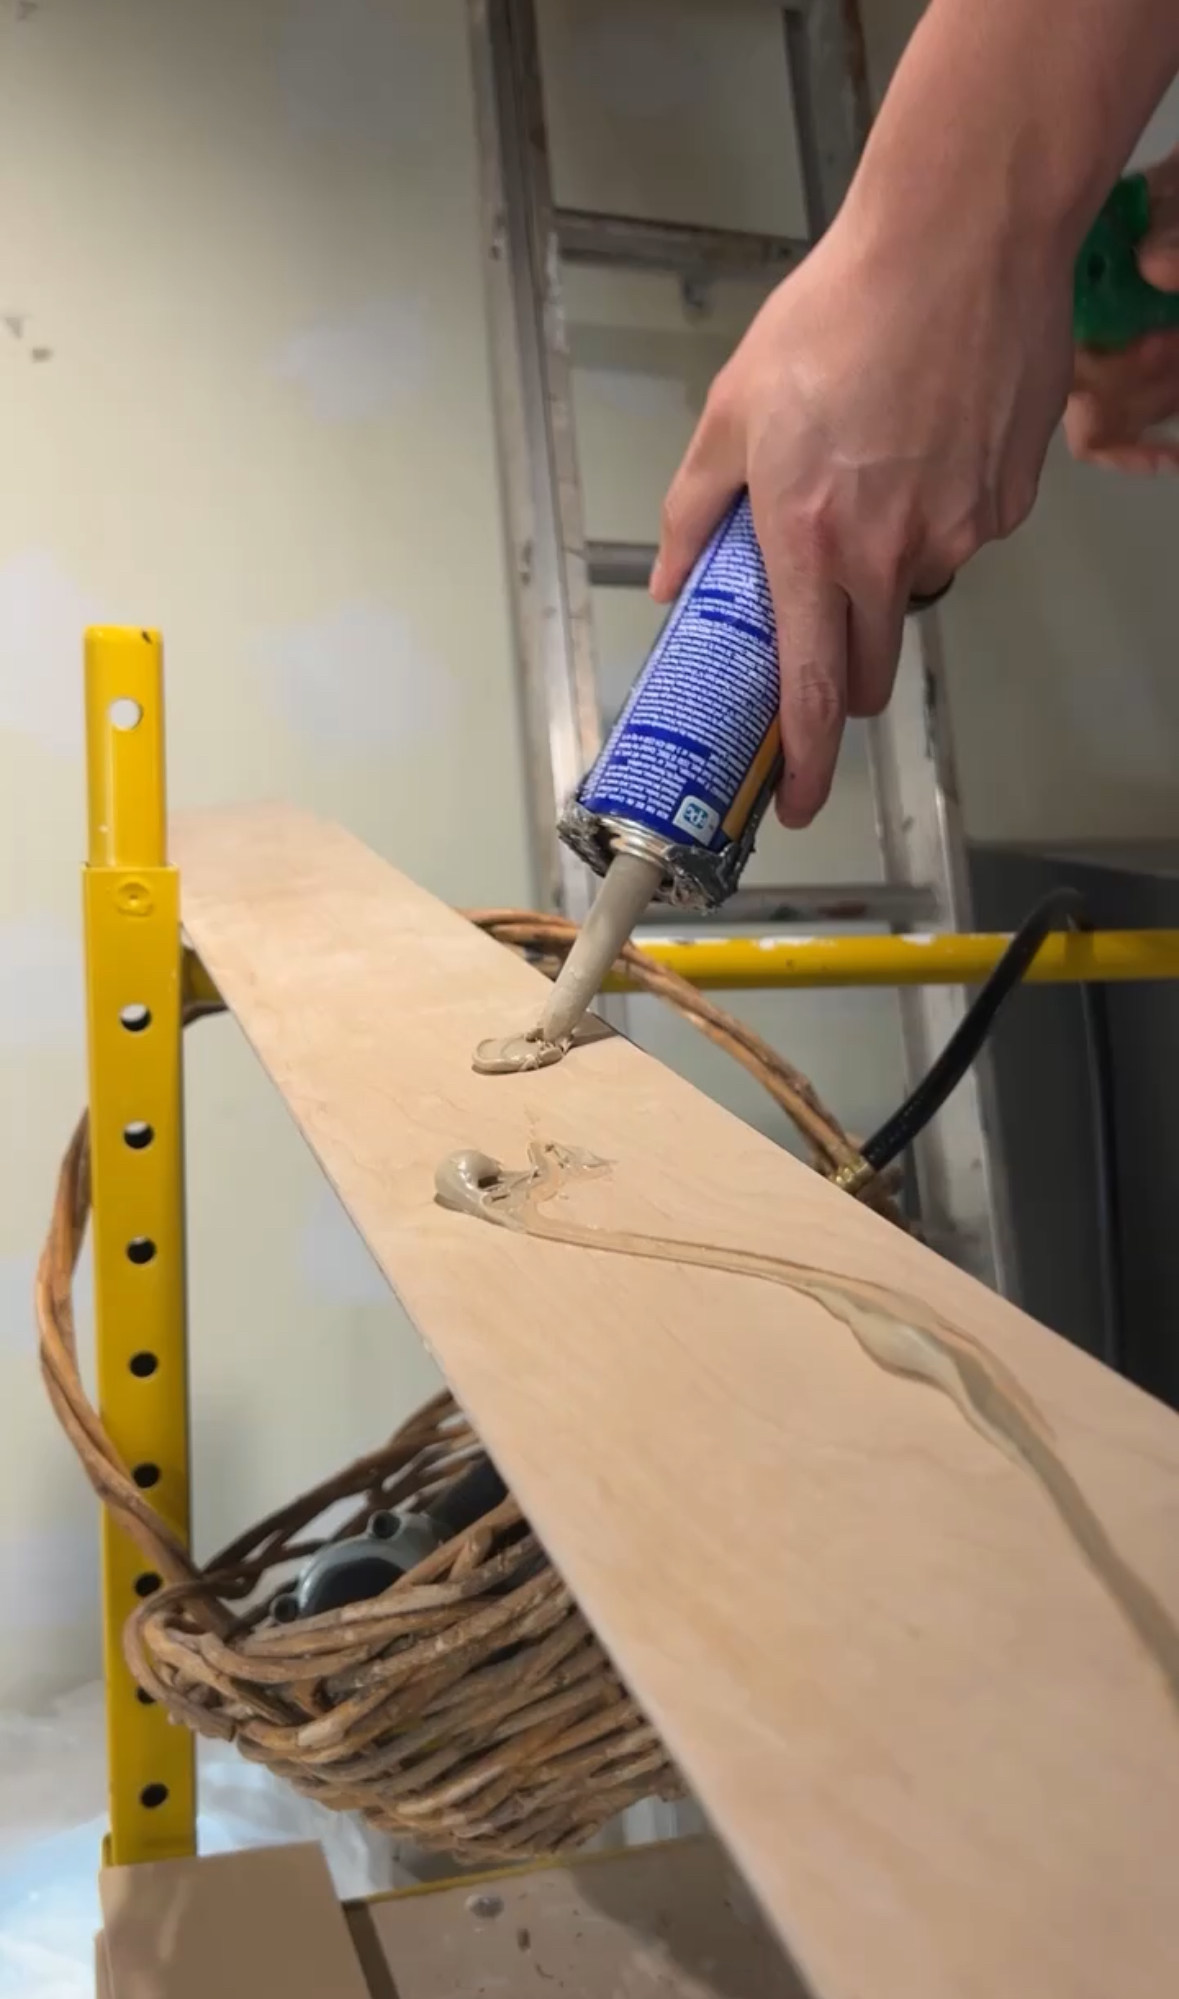
For each slat, we applied construction adhesive in a squiggly line across the back. Then we pressed the plank to the ceiling and secured it with the brad nailer.
We butted each plank directly up against the one before it to eliminate gaps and make the rows look seamless. We used a spare piece of ¼ inch plywood as a spacer between each row to keep the gaps even as we worked down the slope of the ceiling.
Important tip: Avoid creating a pattern with your seams. Start each new row with a different length plank so it looks natural and random. Repeating seams will stand out and distract from the clean lines you’re going for.
Once one side of the vault was complete, we repeated the same process on the other side.
SIX | Work Around Lights + Vents
For any light fixtures or vents, we used a multitool to carefully notch around them. Take your time and measure everything so your cuts are clean and still get covered by the light’s canopy or trim.
SEVEN | Add Trim (Eventually)
Adding trim around the edges of the ceiling is the finishing touch that really pulls the whole look together. It helps clean up any raw plywood ends and gives everything a more intentional, polished feel.
Full transparency: we haven’t gotten around to this step yet. It’s been sitting on our to-do list, just waiting for a free weekend that never seems to come. But take it from us! If you can, knock it out right after you finish the slats, DO IT.
Once you step back and admire the new ceiling, it’s way too easy to live with unfinished edges longer than you meant to.
Budget Breakdown of Our Modern DIY Slat Ceiling
| ITEM | COST |
| Birch Plywood Sheets (25 count) | $1,000 |
| Stain | $17 |
| Ceiling Paint | $60 |
| Wood Conditioner | $18 |
| Brad Nails | $17 |
| Adhesive | $40 |
| TOTAL | $1,152 |
Note: Prices vary by location and stock. Some affiliate links may offer discounts or alternative suppliers.
What We’d Do Differently Next Time
Looking back, there are a few things we’d tweak.
First, we would work harder to nail into studs.
Adhesive works well, but more secure anchoring is always better.
We might also use ½ inch plywood instead of ¼ inch. Ours looks great, but if you stand at the top of our stairs and squint, you can see a slight wave in a couple of planks.
Lastly, we’d increase the gap between rows. Using a wider spacer like ½ inch would give it a more defined slat look rather than a paneling feel. The ¼ inch gap still looks good, but it’s something to consider if you want more definition.
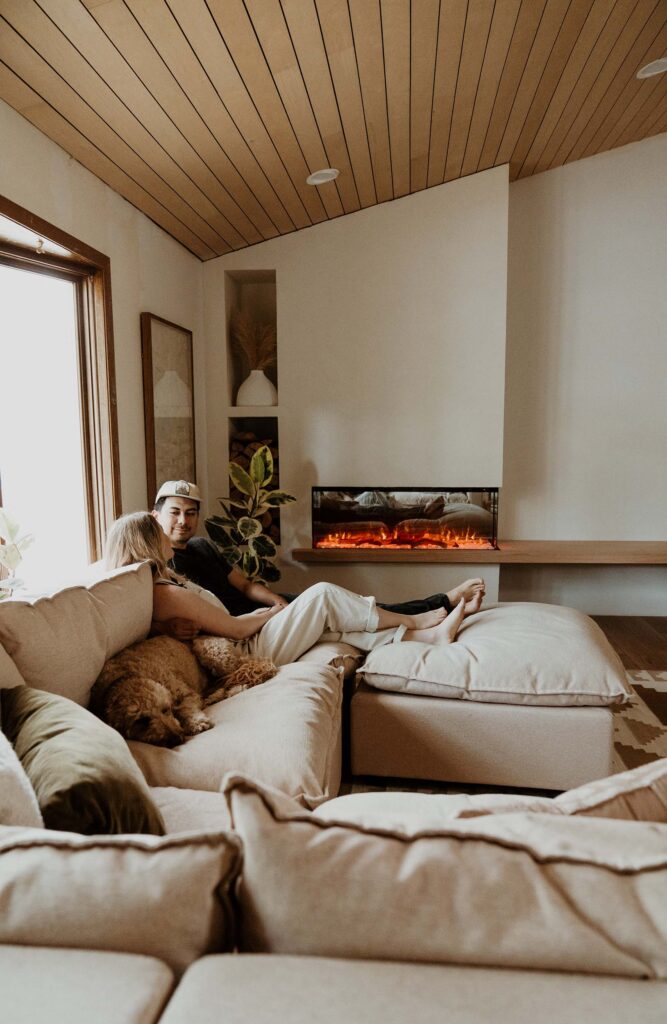
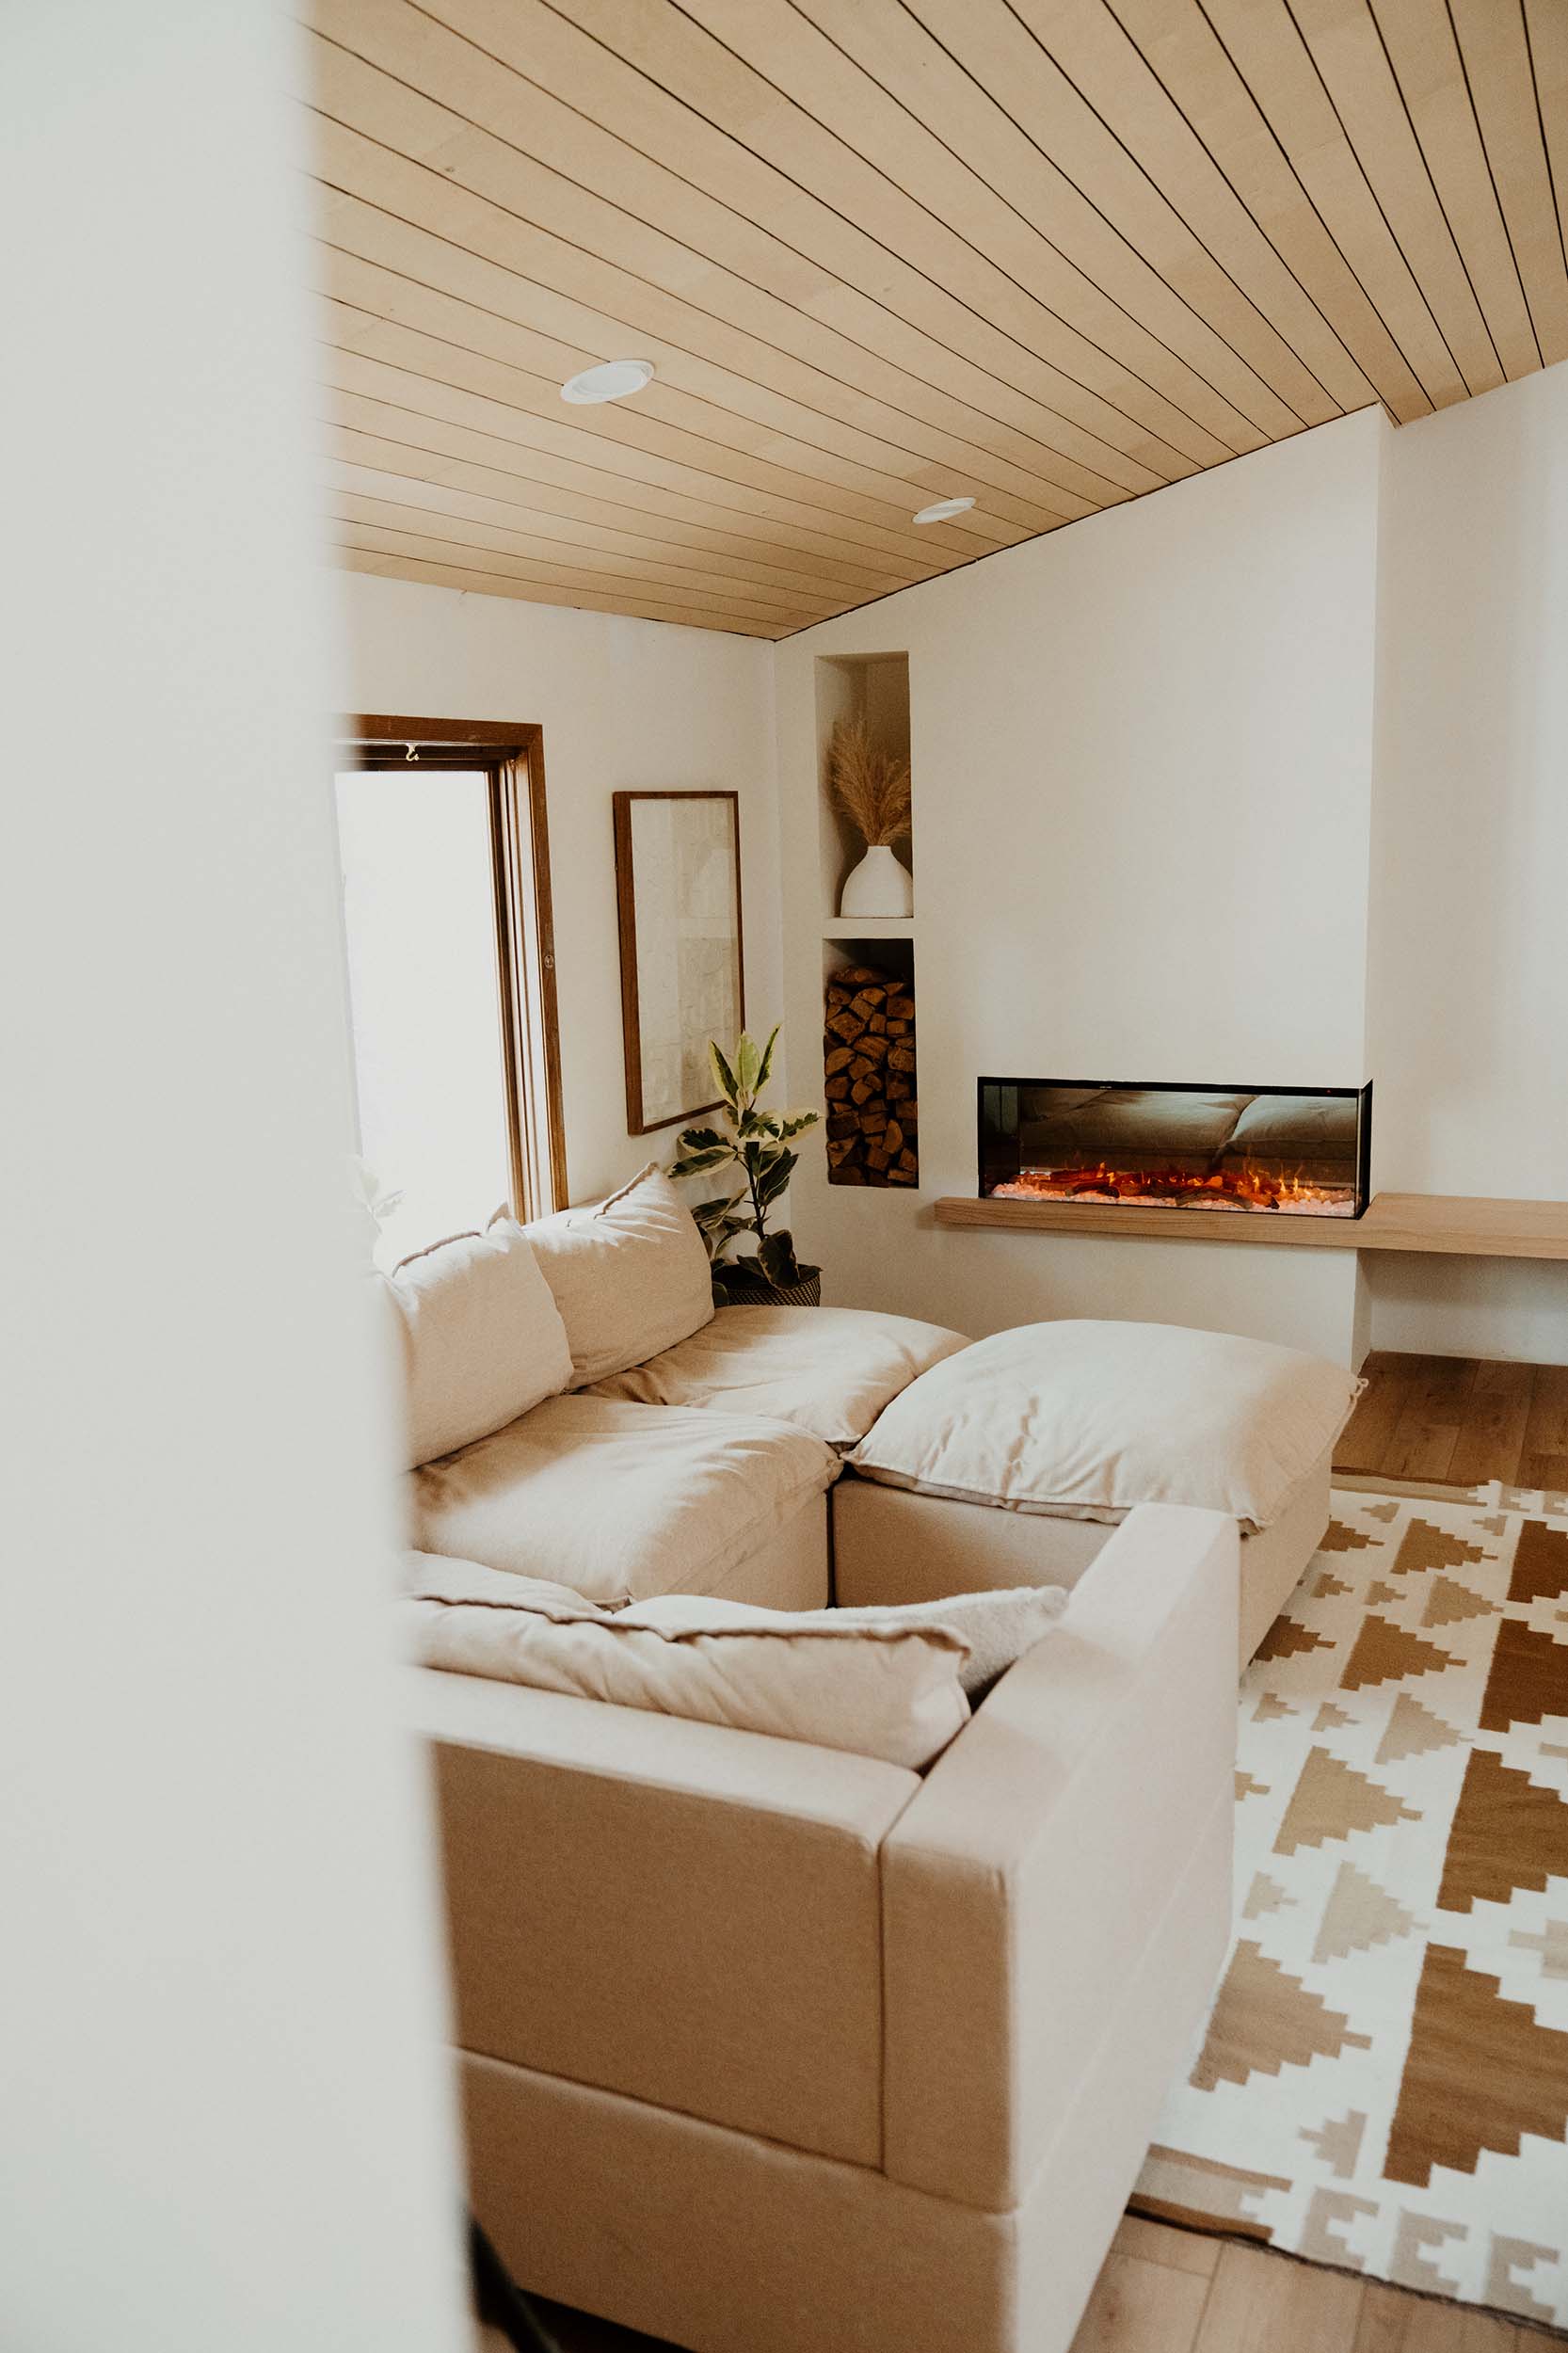
The Reveal: Warm, Modern, and Totally Us
We can’t get over how much this project transformed our living room. It feels warmer, cozier, and somehow taller. It adds so much character—and everyone who visits asks about it.
This was a popcorn ceiling cover-up… but make it design-forward.
Shop the Modern DIY Slat Ceiling Look
You Can Totally Do This
If we can figure this out with a baby in the house, rented tools, and zero professional training, you can absolutely do it too. This slat ceiling project gave us one of the biggest visual upgrades for the lowest cost, and it’s proof that you don’t need a huge budget to make a big impact.
Have questions about the process or want to share your own ceiling glow-up?
We’d love to hear from you.
Follow along with our projects and daily updates here:
📷 Instagram
📹 TikTok
🎥 YouTube
For more tutorials and behind-the-scenes moments, come hang out with us across platforms.
We’re so glad you’re here.
Happy DIYing,
Sway + Sarah Build
How We Covered Our Popcorn Ceiling with a Modern DIY Slat Ceiling for Under $1200
How We Covered Our Popcorn Ceiling with a Modern DIY Slat Ceiling for Under $1200
")
